Clean up your hard drive to help speed up your computer. Here’s how:
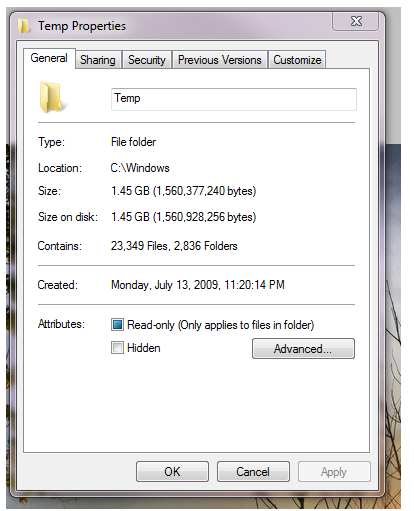
Over time, there are many places on your hard drive that fill up temporary files. For example, there’s a temp folder in your user profile and another one under the windows folder. Your web browsers have temporary file folders. Windows creates log files when programs crash. The list goes on.
Not only does this buildup of garbage consume your available storage space and contribute to fragmentation, but it slows down your computer in another way too. Your drive has an index of all the files stored on it. That index operates in a way similar to a card catalog in the library (I just gave away my age…) In any case, your computer has to search the index for every file it wants to find. The smaller the index, the faster your computer is able to locate the files.
So, let’s take out the trash! Integration Technologies Inc recommends another free product to help you with this. That program is called CCleaner and it’s made by the same programmers that provide us with Defraggler. For your convenience, both of these download links can be found on our resources page. Simply download and install the software, then click the Run Cleaner button on the lower-right.
Finally, though we think CCleaner is a great product, it has a monitoring feature that runs automatically in the background. It shouldn’t hurt anything if you leave this running, but we prefer to turn it off. Simply open CCleaner, click the Options button on the left and then select the Monitoring entry. You’ll want to uncheck all of these boxes. When you uncheck Active Monitoring, it’s going to give you a warning similar to “Warning – This action isn’t recommended.” Don’t be concerned; Just click Yes and then close CCleaner.
When you’re ready to clean again, just open up the program click the Run Cleaner button. The software will automatically check for updates when you open it. Updating is up to you, but it shouldn’t hurt anything regardless of your choice!
Scott Johnston | Integration Technologies, Inc. | www.myiti.com
There are countless resources available to get remote access to your computer. LogMeIn has a plethora of solutions. There’s Remote Desktop Protocol (RDP), VPN, TeamViewer, GoToMyPC and many more. Integration Technologies Inc. preferred solution is ConnectWise, formerly ScreenConnect. We’ve been using their service for several years and they now have a free version available that will work great for small tech shops and individuals. As of this writing, the link to their free sign-up is right here.
To start using their service, you’ll need to go to the link above and create an account. They ask you for your email address and a password. They also ask you to select a custom URL. You will definitely need to remember all three pieces of information, so record them somewhere secure. I’d also suggest you use memorable options, since you may need to access your computer from anywhere. After you submit the form, they’ll collect a few more pieces of information from you. If you’re using this for individual use, just add “personal” as the business name, select “1-3 technicians” and “other” as the business model. They may change this form in the future, but you get the idea.
ConnectWise operates in 2 modes at the same time. One mode is temporary access and the other is a permanent installer. We are only going to cover permanent access in this article. So, once you have created your account, we are going to click the access tab on the left and then click the build button. You can customize this as you desire, but simply selection the options Machine Name, Personal, and Windows (.exe) will get the job done nicely. Once you’ve selected those, click the Download link.
Now we have your account setup and your software created. The file you just downloaded needs to be run on the computer that you want to access remotely. After that, we need to go to a computer that we want to remote access that computer from. Simply go to the custom URL you created in the beginning, then type in your username and password. Once logged in, click on the Access tab on the left and then double-click on your computer name. Follow the prompts and you’ll be remotely controlling your computer.
One important note – To be able to access a computer remotely, it needs to be powered on. It can’t be asleep (Control Panel > Power Options) and it needs to be connected to the internet. As always, if you need any assistance, please contact Integration Technologies, Inc.
Scott Johnston, Integration Technologies, Inc. | www.myiti.com
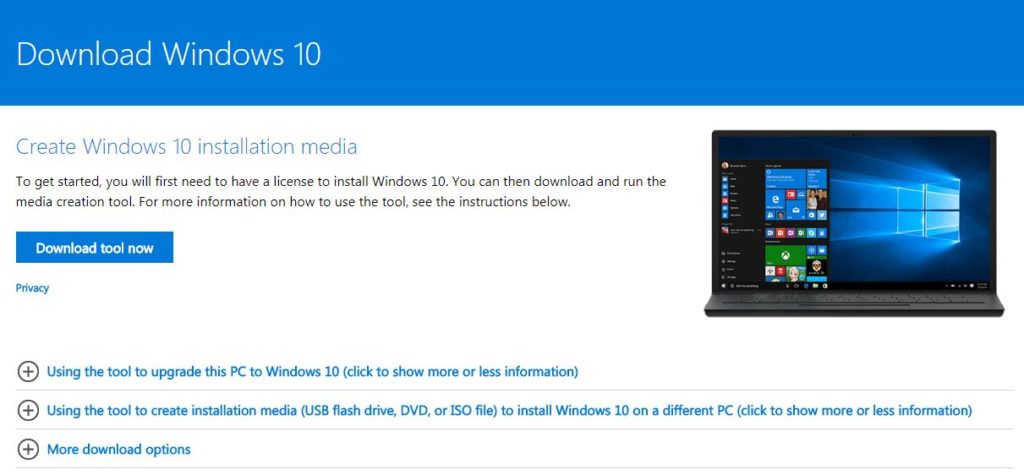
My Windows 10 updates are failing… again. It happens all too frequently, especially when Microsoft deploys a new release; For example, “Windows 10 Update To Version 1803”. We’ve found the fastest way to fix this issue is to simply grab the latest Windows 10 Media and do an upgrade. It sounds scary, but it’s pretty simple. Let’s dig in:
null
If prompted, select Install Anyway and Yes.
Accept the license agreement.
Select the Create Installation Media… option and click Next.
Select USB Flash Drive and click Next.
Select your USB drive from the list and click Next.
This will take a little while, especially if your internet connection isn’t the fastest. Be patient.
Once the creation is done, click the Finish button.
Now you need to open Windows Explorer and browse to your thumb drive.
(Alternatively, if you unplug the drive for about 10 seconds and plug it back in, the folder may open on its own.)
With the folder open, double-click on Setup.exe (It may just say Setup on your computer.)
Click Yes if you are prompted to allow the program to run.
Leave the default option of Download Updates selected and click Next.
Click Accept.
Make sure it says to keep personal files and apps, then finish the wizard.
From here, it can be a little different for each PC, just follow the wizard and be patient.
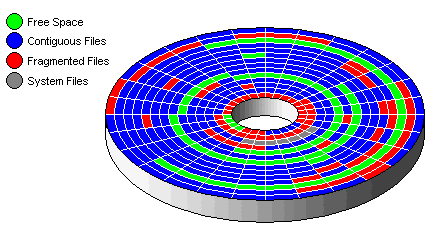
One of the easiest things you can do to improve your computer’s performance is to defragment the hard drive – if your computer needs it! Let’s learn about fragmentation and how to fix it! On a hard disk drive, commonly abbreviated as HDD, data is stored in little pieces. When your computer needs to do something with that file, it has to find and assemble all of the pieces before anything else can happen. Think about it like a jigsaw puzzle. If you have all of the pieces numbered and laid out in order, the puzzle could be assembled very quickly. If those pieces are all jumbled around, it’s going to take you a lot longer to assemble the puzzle. Fragmentation on your hard drive is similar. As you use your computer, those little pieces continue to get more and more jumbled around and things continue to move slower.
So how do we fix it? Integration Technologies Inc. likes the free tool called Defraggler. You can find the download link on our resourcespage. Simply download, install and run the program. With the software open, click the Defrag button at the bottom and let it run. This could take a while, so leave your computer on and go have a cup of coffee.
What if you have a Solid State Drive (SSD)? You may have read that defragmenting a solid state drive shortens the life of the drive and doesn’t help performance. That is true with many defragmenting programs. However, Defraggler recognizes solid state drives and can utilize some of their built-in functions to optimize the drive’s performance. You won’t see the same performance gain you get from defragmenting a mechanical hard drive, but it can help. Most importantly, you won’t be causing harm to your SSD when using defraggler!
Scott Johnston | Integration Technologies, Inc. | www.myiti.com
Integration Technologies Inc. recommends rebooting your business computer at the end of each day and then leaving it at the logon screen. While this won’t prevent all computer issues, it certainly has a lot of advantages. Let’s look at a few of them.
First, if we leave the computer powered on at night, it has an opportunity to check for and install updates, run disk defragmentation, update antivirus software and run scans, along with other maintenance tasks. It’s able to do this at night, so those tasks don’t slow you down during the day. If you’re setup to do so, leaving it powered on overnight also keeps the computer available so you can access it remotely.
If you reboot your computer as you’re leaving your desk for the day, you don’t have to wait for the computer to shut down, run any update tasks and fully reboot. The computer takes care of all that while you’re away from your desk.
The reboot itself allows your operating system to shut down all of your running programs, clear memory and essentially get a “fresh start.” This daily reboot will help prevent small annoyances and issues that tend to creep up when your computer has been powered on for days or weeks on end. Frequently, Windows updates also need to restart the computer to complete their installation. Your daily reboot allows this to happen, so new updates can continue to be downloaded and installed as they’re available. Consequently, this also helps keep your computer a little more secure.
You might be experiencing a software problem. Please see our detailed instructions on troubleshooting this problem. Quickbooks Database Server Manager Conflicts With DNS Server: What software does this problem apply to?
All versions of Windows Server 2008, Windows Server 2012 and Windows Server 2016
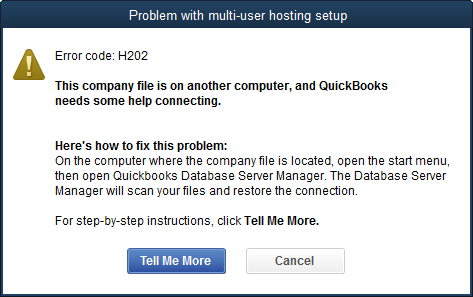
Users will receive the error: Error Code: H202 This company file is on another computer and QuickBooks needs some help connecting.
The Quickbooks Database Server service (QBDATABASESERVER2x) on your Windows Server is stopped and will not start.
If you try to start the Quickbooks Database Server service, you may receive the error: The QuickBooksDB26 service on Local Computer started and then stopped. Some services stop automatically if they are not in use by other services or programs.
The event log on the server may contain the following error or a slight variation:
The description for Event ID 1 from source SQLANY 16.0 cannot be found. Either the component that raises this event is not installed on your local computer or the installation is corrupted. You can install or repair the component on the local computer.
Do you need a quick fix that will get Quickbooks working right now?
Log onto your Windows Server with a network administrative ID.
Hold down the WINDOWS key on your keyboard and press R. The RUN dialogue should open.
Type in SERVICES.MSC and press ENTER. The SERVICES window should open.
Locate the DNS SERVER entry. Right-click on it, select STOP and wait for it to complete.
Locate the QBDATABASESERVER2x (Your x will be a number) entry. Right-click on it, select STOP and wait for it to complete.
Locate the QBDATABASESERVER2x (Your x will be a number) entry. Right-click on it, select START and wait for it to complete.
Locate the DNS SERVER entry. Right-click on it, select START and wait for it to complete.
Try Quickbooks and see if it is working properly now.
Note that after you reboot your server, the problem will return! This is a quick, but temporary fix.
Alright, that seemed to fix the problem, but why? The Quickbooks database server is trying to use some of the same TCP/IP port numbers as the DNS Server. Quickbooks will not adapt to use other ports if the numbers it asks for are in use. However, DNS Server uses a wide range of port numbers, so if they are in use, it simply finds some that aren’t. In this instance, if the DNS Server is started first, The Quickbooks database service will not start. If we start the Quickbooks database server service first, then start the DNS Server service, everything is fine. In short, the QBDatabaseServer2x must be started prior to the DNS Server service.
I don’t want to deal with this every time my server reboots; what do I do?There are 3 valid options that we’re aware of. Note that the last of these 3 solutions is probably the best solution, if you are running Windows Server 2012 R2 or newer operating system.
The first option is to make the DNS Server depend on the Quickbooks database server by adding an entry to the registry. Note that this involves editing the registry. If you’re not careful, you can cause some serious problems. The next time you upgrade Quickbooks, you will likely have a problem with this method. If the old Quickbooks database server isn’t available to start, so your DNS Server won’t start. That’s a much bigger problem. If you use this method, find some way to remind yourself about the dependancy when you next upgrade the Quickbooks Database Server:
Log into your server and open the SERVICES console (See steps outlined above.)
Locate and note the exact name of your QBDATABASESERVER2x entry (It is likely 24, 25, 26 or 27 – depending on your version of Quickbooks.)
Close the SERVICES console.
Hold down the WINDOWS key on your keyboard and press R. This should open the RUN dialogue box.
Type REGEDIT and press ENTER.
Navigate to: COMPUTER\ HKEY_LOCAL_MACHINE\ SYSTEM\ CURRENTCONTROLSET\ SERVICES\DNS
Double-click on the DEPENDONSERVICE entry and a dialogue should open. There should be several lines, each with a specific service listed and the last line should be blank.
Move your cursor to the blank line, Type in your EXACT QBDATABASESERVER2x name.
Press ENTER one time so that the cursor is on a blank line
Press the OK button
Close registry editor
Stop the QBDATABASESERVER2x service
Stop the DNS SERVER service
Attempt to start the DNS SERVER service. This should start BOTH the QBDATABASESERVER2x service and the DNS SERVER service.
2. The second option is to exclude the port range from the DNS Server manually. As always, there are a couple of ways to do this:
Use the DNSCMD tool:
Open a command prompt using the RUN AS ADMINISTRATOR option
Execute this command: DNSCMD /Config /SocketPoolExcludedPortRanges <excluded port ranges> (See the bottom of this article)
Edit the registry:
Run REGEDIT.
Navigate to: COMPUTER\ HKEY_LOCAL_MACHINE\SYSTEM\ CURRENTCONTROLSET\SERVICES\DNS\PARAMETERS.
If it does not already exists, add a REG_MULTI_SZ with name SocketPoolExcludedPortRanges
Double-click on SocketPoolExcludedPortRanges and add the necessary port range (See the bottom of this article)
3. The third option is to use NETSH and it’s a pretty easy fix. However, you likely need to be running Windows Server 2012 R2 or Windows Server 2016 for this to work:
Open a command prompt using the RUN AS ADMINISTRATOR option
Run this command: netsh int ipv4 add excludedportrange protocol=udp startport=XXXXX numberofports=5 (Note that you need to replace the XXXXX with the appropriate number. See the bottom of this article.)
So which port number (or range) do I use?
Quickbooks 2014, QBDatabaseServer24 – Port 55358 – Port Range 55358-55362
Quickbooks 2015, QBDatabaseServer25 – Port 55363 – Port Range 55363-55367
Quickbooks 2016, QBDatabaseServer26 – Port 55368 – Port Range 55368-55372
Quickbooks 2017, QBDatabaseServer27 – Port 55373 – Port Range 55373-55377
If you’re using the second method above, you’ll need to use the port range. If you’re using the third method, you just need to use the single port number, as the NUMBEROFPORTS=5 option automatically takes care of the range portion.
If the issue persists please feel free to contact us here for assistance.
Backing up your data and system information is a very important part of disaster planning. Here are several reasons to back up your computer data.
Your data can be damaged or lost in several ways, including:
hard disk failure
physical computer damage like fire or flooding
theft
employee error
intentional damage from a malicious employee
viruses – especially the crypto-locker virus and many variants.
Having a good, up-to-date backup is sometimes the only way to recover your irreplaceable data.
This applies to both home computers and businesses. At home, you may have decades of family photos and videos stored on your computer. Without a good backup, you’re taking a daily risk that those memories may be lost forever. In the case of business, your accounting data, customer records, contact information, email and databases can all be left at risk.
There are several good backup options available. Let us help you find one that’s right for your situation. Contact us today.
Let us help you become a more efficient computer user!
I see a lot of people take their hand off the keyboard and reach for the mouse far too often. You might initially think this isn’t a big deal because it only take a few seconds, but if you do it hundreds of times per day and thousands of times per month, those seconds start to add up fast! Save your seconds and learn to use your keyboard shortcuts!
The magic of TAB (And I don’t mean the soda!):First of all, let’s look at logging into your computer and programs, as well as filling out forms and data entry. Use that TAB KEY! Your TAB key will instantly take you to the next field in a form, instead of having to grab your mouse and manually position the cursor. Let’s take a quick look at this and see how much time we can save. We’ll fill out a quick form online:
Enter your company name (Tab, we just saved 3 seconds)
Enter your first name (Tab, we just saved 3 seconds)
Enter your last name (Tab, we just saved 3 seconds)
Enter your phone number (Tab, we just saved 3 seconds)
Enter your address (Tab, we just saved 3 seconds)
Enter your city (Tab, we just saved 3 seconds)
Enter your state (Tab, we just saved 3 seconds)
Enter your zip code (Tab, we just saved 3 seconds)
Click Submit and if my math is correct, we just saved 24 seconds!
That’s just one quick example and could save you several minutes every day if you’re used to reaching for the mouse.
Bold, Italic, and Underline: Did you know there are shortcut keys for that? You do now! As you’re typing along and you’re about to type something in bold, don’t take your fingers off of those keys! Use the key combination CTRL+B and as you type, you’ll now be in bold. When you’re finished typing in bold and you’re ready to go back to your standard font, just press CTRL+B again and you’ll exit bold mode. That same key can be used if you highlight a section of text that you’ve already typed and press CTRL+B. It will make normal text bold. If the text is already bold, it will remove the bold attribute. Of course, it’s most efficient to do this “in-line” so you don’t have to go back and highlight! Doing that wastes more of our precious seconds! But wait, there’s more! CTRL+I (“eye” not “el”) will make your text italic.And if you call now… CTRL+U will make your text underlined. Quick Reference:
CTRL+B (Bold)
CTRL+I (Italic)
CTRL+U (Underline)
Cut, Copy & Paste: Yup, there are shortcuts for these too and if you combine them with the text selection tips in the next section, they can save you even more time. These are pretty simple, but they keys are a little tricky to remember, compared to our text emphasis shortcuts above. However, I’ll do my best to explain what I believe Microsoft had in mind. Here are the shortcut keys:
CTRL+X – Cuts the selected area
CTRL+C – Copies the selected area
CTRL+V – Pastes the selected area
Warning, this paragraph is full of speculation that only a few people may find interesting or useful. Obviously, this isn’t as easy to remember, but each key can only have one shortcut, so we can’t use C for CUT and C for COPY! Here’s what I think Microsoft came up with for us: I think the C for Copy is obvious. If we go just to the left of C, we have X. If we think of X symbolically, it makes a pretty good option for cut. We’re just left with V and the only reasonable explanation for that choice is its relative position to X and C. We generally think of Cut, Copy and Paste and the X, C and V keys are all in a little row right next to each other.
Text Selection and cursor movement: This is occasionally useful, but won’t always keep you from grabbing your mouse. Once you start using more keyboard shortcuts, you’ll fall into a rhythm and instinct will tell you whether to select text using your keyboard or mouse. Let’s get to it! Cursor positioning is easy and can be very useful, so let’s start there:
All four of your arrow keys at the right of your keyboard will move the cursor one position in whatever direction you push.
Your HOME key will take you to the beginning of the current line.
Your END key will take you to the end of the current line.
If you hold CTRL and press HOME (CTRL+HOME) it will take you to the very beginning of your document.
Similarly, CTRL+END will take you to the end of your document.
If we combine that with some shortcut keys to select text, they can become even more useful!
CTRL+A will select all of the text in your current document.
Holding down the SHIFT key while using any of the cursor movement options above will select a block of text
You’ll have to get used to some of these and others will be useful almost immediately. However, I’m confident that these shortcuts are worth the investment and will save you a significant amount of time over the days and weeks to come.